
How to Wire and Configure an SGxx Behind a Router
The following is a schematic diagram of wiring an SGxx appliance into a typical home network behind a router. It also shows a graphical representation of where in an appliance certain relevant operations are performed.
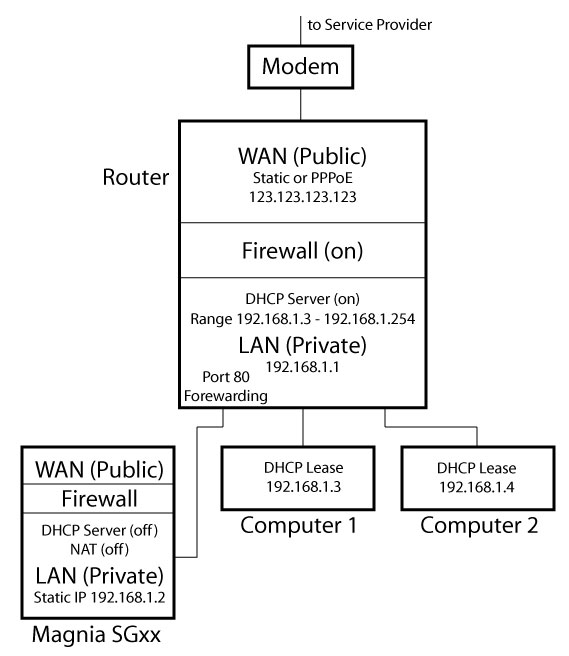
Notice that the WAN (Wide Area Network) side of the SGxx is not connected to anything. See this table.
Screen Shots of the SGxx Admin Page, Network->Internet Tab
The following screen shots follow the progression of steps you go through to set up the WAN side of a Toshiba Magnia SGxx series Internet Server Appliance. In this example, we are setting up for a connection to the internet via a DSL modem with a dynamic IP address and PPPoE authentication.
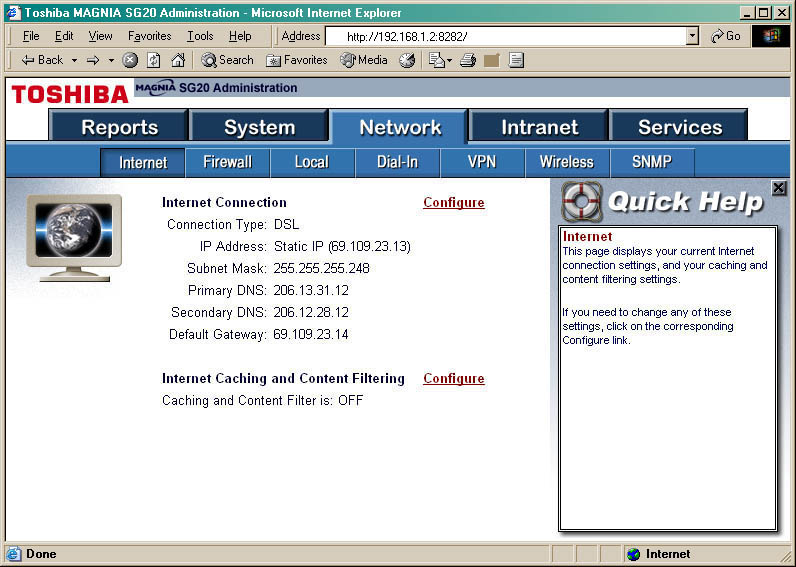
Network->Internet
This page shows the current configuration of the WAN (public or untrusted) port. Select the Configure link next to Internet Connection.
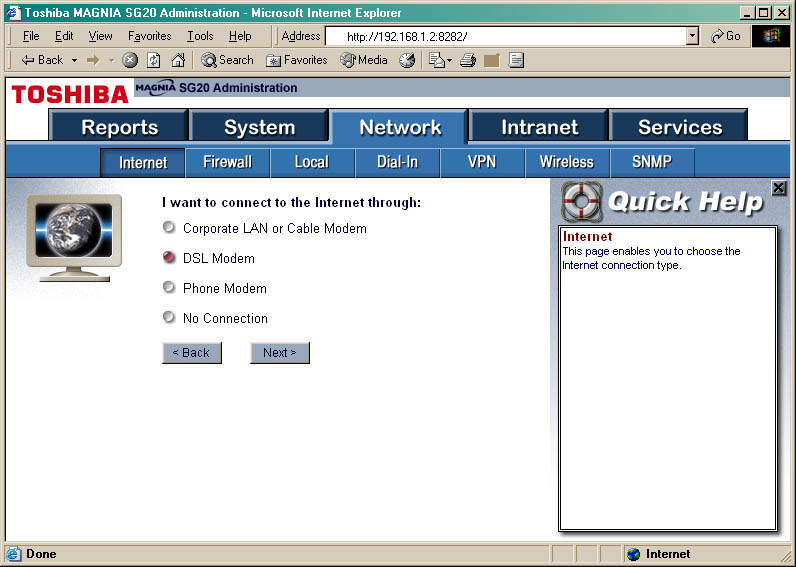
Network->Internet->Internet Connection Configure
Select DSL Modem and click Next>.
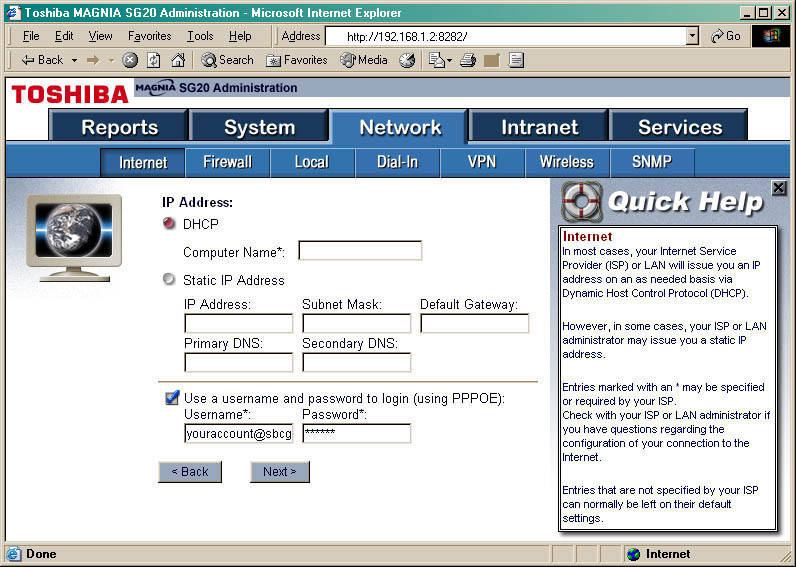
Network->Internet->Internet Connection Configure->DSL Modem Next>
Click the DHCP radio button, check the Use a username and password... checkbox and fill in the Username*: and Password*: fields.
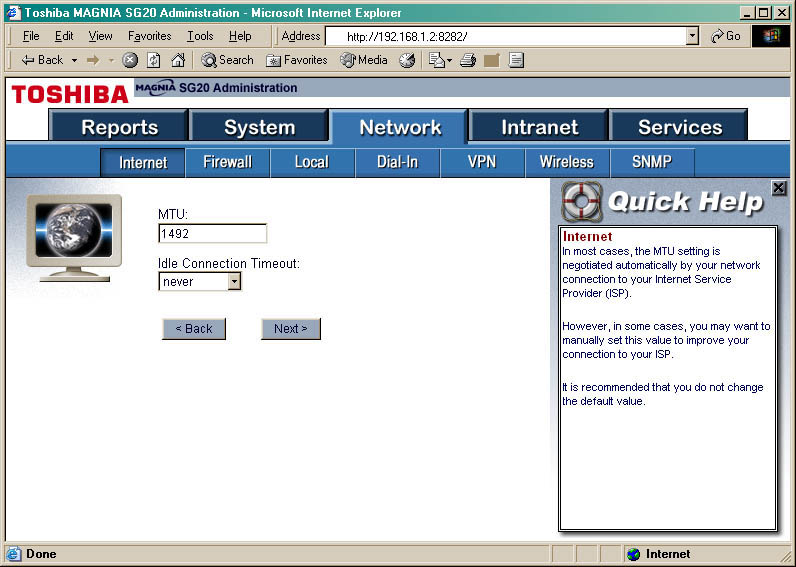
Network->Internet->Internet Connection Configure->DSL Modem Next>->IP Address Next>
1492 is usually a good seting for MTU.
Screen Shots of the SGxx Admin Page, Network->Local Tab
The following screen shots follow the progression of steps you go through to set up the LAN (Local Area Network) side of a SGxx appliance.
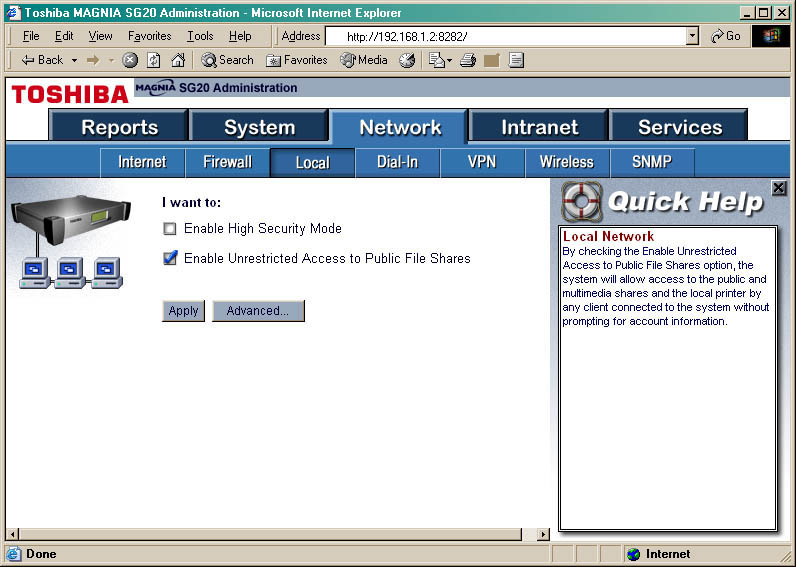
Network->Local
For my uses I like to check Enable Unrestricted Access to Public File Shares (see Quick Help on the right).
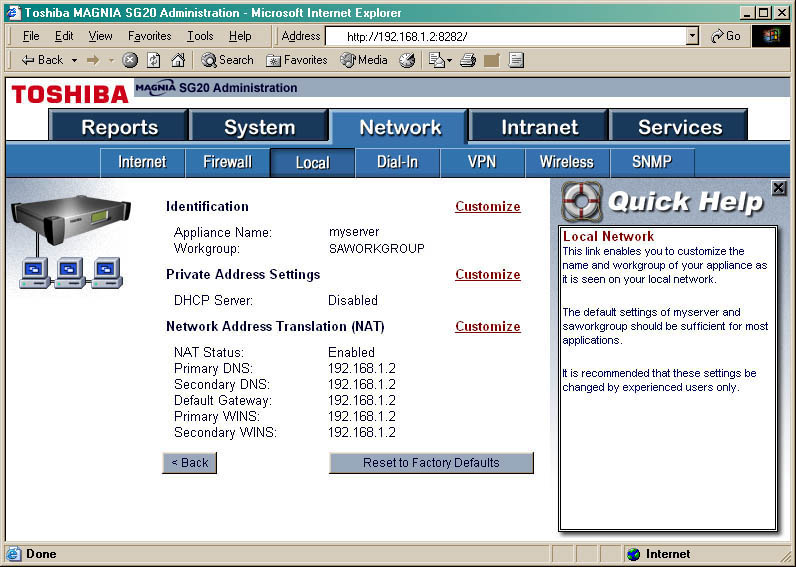
Network->Local->Advanced
This page shows the current configurations for the LAN side of your SGxx. We'll leave the Network Address Translation (MTU) alone.

Network->Local->Identification Configure
Appliance Name: can be anything as long as it's not already in use. Workgroup: can must match the workgroup name set up in the router.
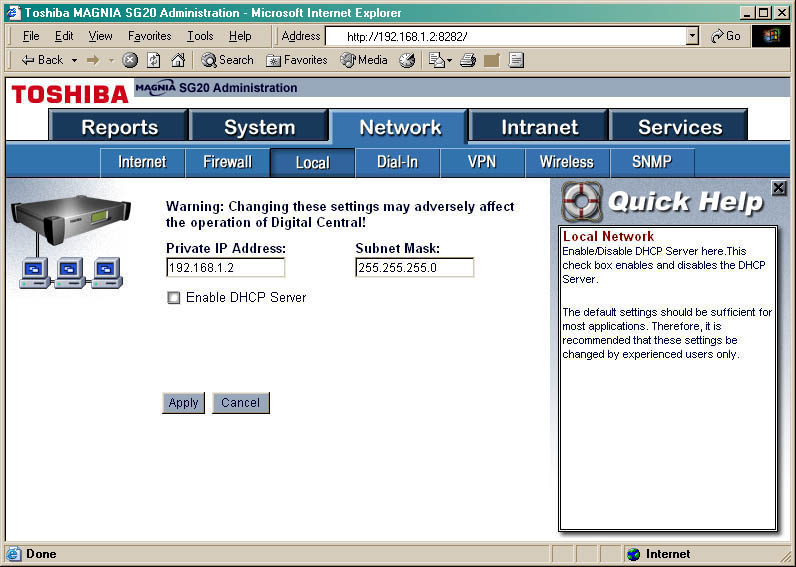
Network->Local->Private Address Settings Configure
The Private IP Address: field contains the static LAN IP address of your SGxx. Set the Subnet Mask: (SNM) according to your private IP range (see this table). Disable DHCP since that is going to be handled by the router.
If you have questions, comments or suggestions for improvements to this page, please contact me.